Order Cancellation and return application helps your customers to easily manage order cancellation and return of the placed orders directly from the customer panel which is under the ‘My account’ section of the website. The only norm is the visiting customer has to be a registered customer of your website to manage the same.
On installation of this application, 4 new order statuses would be generated in the Zencommerce admin panel under Settings > Order Processing > Order statuses which plays a major role in the functioning of this application (The behaviour towards the working of this app is explained below in more detail), below are the new statuses:
-
Requested Cancellation
-
Requested Return
-
Delivered
-
Order Completed
How to Install this Application?
1. Login to your Zencommerce Admin panel
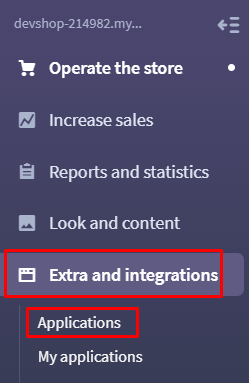
2. Navigate to Extra and Integrations > Applications
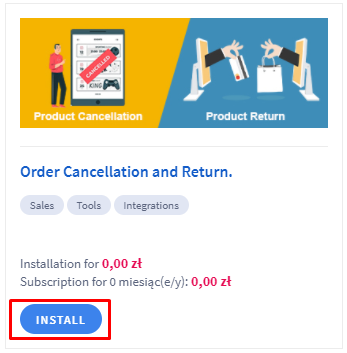
3. Locate app Order Cancellation and return and click on the Install button
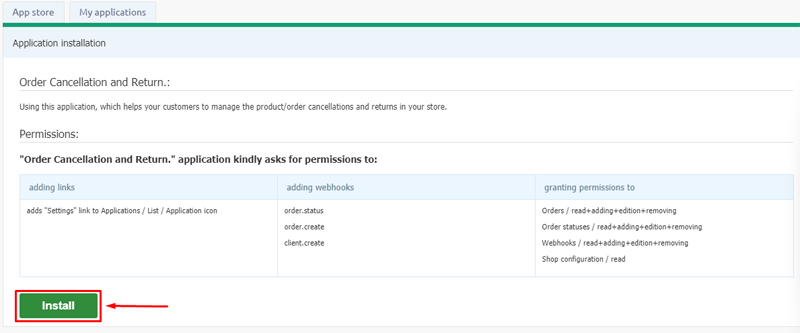
4. Refer to the operation/permissions of the applications and click on the Install button.
6. Successful installation would be notified to you by a success message - ‘Application has been installed in your shop!’
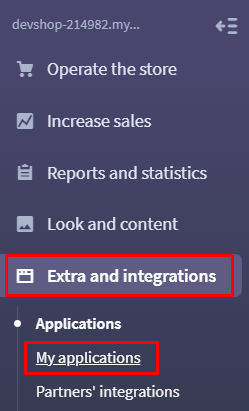
7. Once the app is installed, Kindly navigate to ‘Extra and integrations > My Applications’.
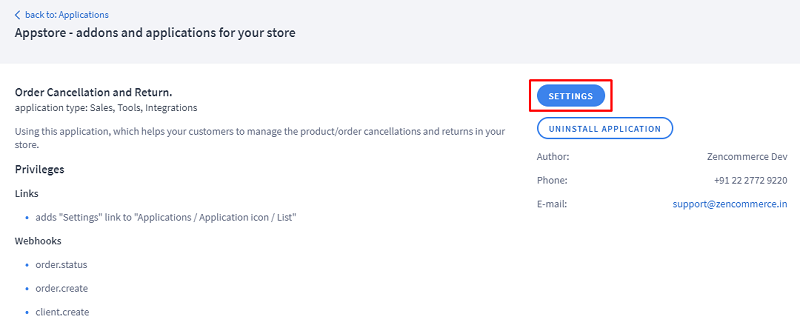
8. Next, click on the installed application and click on the Settings button.
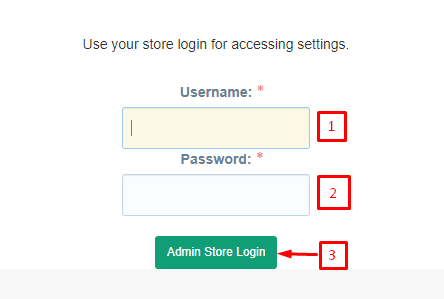
9. You will be asked you to login so as to authenticate the admin accessing the settings. Login with your store admin credentials to configure the app settings.
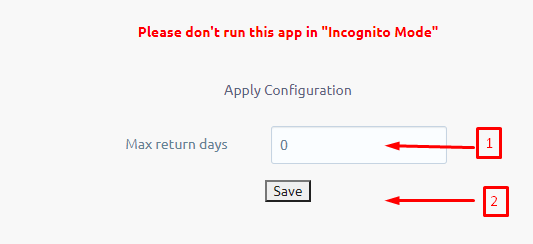
12. In the settings, you would be just asked to update the ‘Max return Days’, this option is like once the order is delivered to the customer, for how many days the customer should be allowed to opt for product/Order return from their customer panel.
For example: If ‘Max return Days’ is set for 4 days then the customer will have an option in his customer panel to opt for ‘Return’ upto 4 days (Note: These 4 days starts when admin changes the order status to “Delivered”) and on the 5th day, system will automatically update the status to “Order Completed” and Return option will get disabled from the customer panel - ‘My account’ section.
13. Set the days and click on Save button
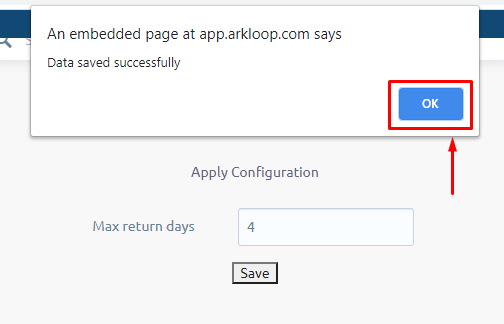
14. Once saved, wait for the success message to prompt which will read as ‘Data saved successfully’. Click on the OK Button.
How this application works:
As we said in the start of this article that 4 new order statuses would be generated when this app is installed. It is very important to understand how these order statuses would be helping us in managing order cancellation and return requests from the store.
As soon as the order status is changed by the store admin to some other status, this option to cancel the order would be removed from the customer panel and the customer then cannot request for Order cancellation.
If the customer cancels the order, the system will automatically change the order status of that particular order in Sales > Orders to “Requested Cancel”, so that the admin will come to know about this cancelation request.Refer below screens to get an idea of above briefed explanation:
A. The default order status in the admin panel when an order is placed
B. When the customer cancels the order from his customer panel, the order status in the admin panel would automatically update to Requested Cancel for the store owner to notify the same.
Currently Email notification is not present for the admin to notify about this cancellation request but your customers will get a system generated on change status notification once the email template is set. You can set this email message in Settings > Order Processing > Order statuses.
Let’s understand how Product Return work:
When the customer receives the parcel, you would be notified of the same by your shipping carrier. You just need to set the Order status to ‘Delivered’ and the customer will get an option to ‘Return’ the order for the set days by the admin from their customer panel.
Refer below screens to get an idea of the above briefed explanation:
A. In the admin panel, when the order status is set to ‘Delivered’, the customer will get an option to opt for the order Return.
B. After the set span of days in the application(as explained in the step no. 12 above) this order status will be automatically updated to ‘Order Completed’.
If you are not offering the return service then make sure you are not setting the order status to Delivered and once the products are shipped, you can directly update the status to ‘Order Completed’.
Other details to know about this feature:
1. If the admin manually changes the store status then whatever triggers are present on those respective statuses will be immediately displayed under my account section in the customer panel.
Example: If order is already shipped and you update the order status to again ‘New’ then the Cancel option would be activated in the customer panel.
Also, if the admin changes the status to ‘Delivered’ then your customer will get the ‘Return’ option.
2. If there is any order which has more than 1 product and if the customer wants to cancel any one product, then they will be allowed to select the product and cancel it.
3. When there are multiple products in the order say 3 products and if a customer opts for return/Cancellation for one product out of 3, then the system will generate a new order only with product details which customer has selected to return/cancel with a status message updated to “Return/Cancel Requested” respectively.
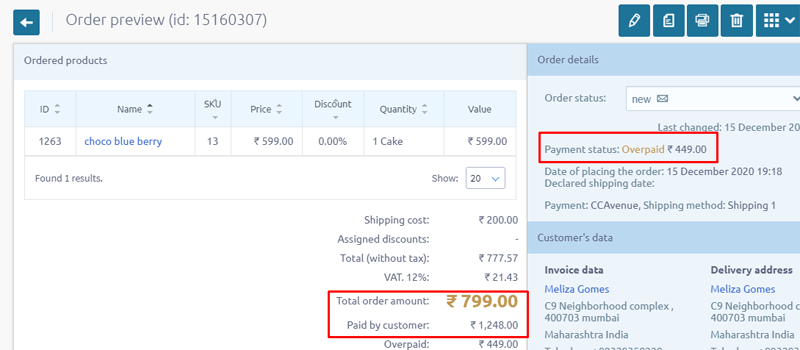
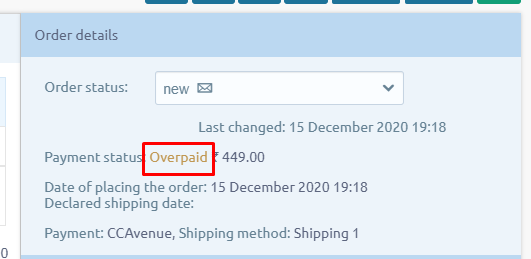
4. We have used above logic because, if we use the same order ID for the update then the complete order status will change. To avoid that, the requested product details would be separated out from main order and will be shifted to the new order ID. These product details are automatically removed from the main original order and therefore the amount in the main order would be displayed as ‘Overpaid’. Do not worry about it as this can be easily handled by the admin by subtracting the product price which is requested for cancellation/return from the total amount.
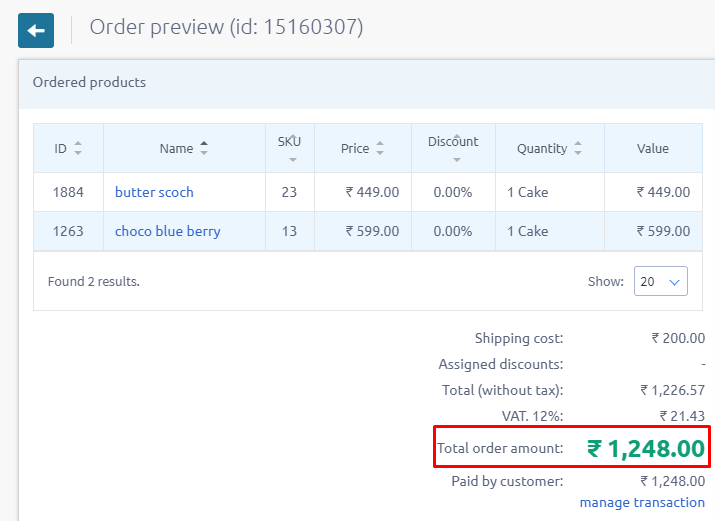
Example, customer places an order for 2 products with total order value Rs. 1278/-
Consider, the customer cancels the product of Rs. 449/- from his customer panel. In this case, you would notice a new order is generated with a new order ID and status set to ‘Requested Cancellation’ and the total value set to Overpaid, refer below 2 screens:
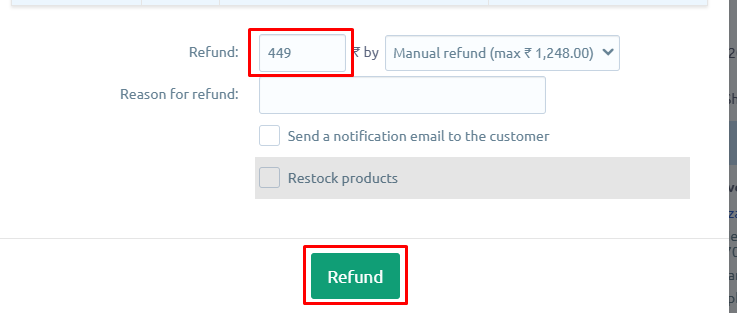
To fix this amount issue, kindly click on the ‘Overpaid’ button of Original order and click on the ‘Refund’ button. Remember that this refund button would just update the price in the admin panel. The actual refund has to be initiated from the payment gateway.
Since the customer has requested to cancel the product of Rs. 449, we need to subtract it from the original order. Hence just enter the amount which to be subtracted in the refund field and Click on refund.
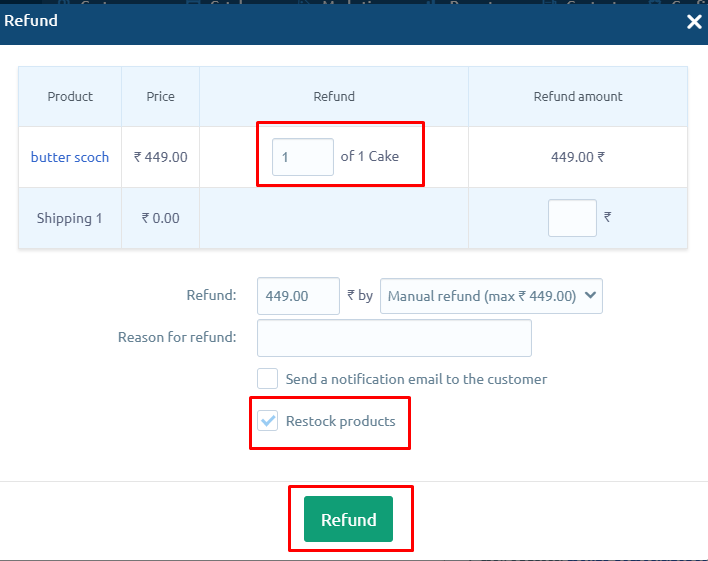
5. If you wish to restock the cancelled or returned product then you can do the same by clicking on the ‘Order Paid’ and opting for ‘refund’. Select the Qty of the product which to be considered so that that the amount is auto captured in the form, Check the option ‘ReStock Products’ and Click on ‘Refund’. Refer below screen to understand the same:
We hope the above steps would assist you in the application setup. If you come across any difficulties in understanding any of the above steps then you are free to reach our support team.

