Product Variant feature allows you to define options to the products to accept customer input while purchasing. A product variant may be its size, color etc. Read this help article and learn what are product variants in the online store, how to create them, and how to manage them.
You can use product variants to sell a product in several versions (e.g. different colour/size etc), at different prices and with different availability. This mechanism allows you to quickly and efficiently generate many variants, which is particularly important for stores with an extensive assortment, especially in industries such as clothing, furniture, interior furnishings etc. The variants are displayed on the product details page just above the add to cart button.
A. To Create the variant set, kindly follow below steps:
1. Go to Operate the store > Variants
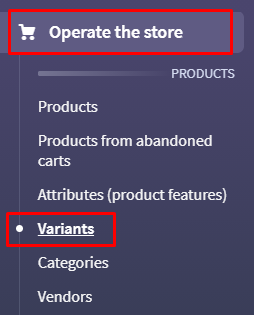
2. From the top right-hand side, click on the button ‘Add Variant Set (Group)‘

3. In the Name field enter the name of the variant group, eg. Clothes.
Kindly note, this name will not be visible to customers and is only for the admin reference.
4. Click on the button "Add a Feature"

5. Enter the field name(this title would be displayed to the customer in the assigned products) and select the required field type.

Each field type settings are explained below:
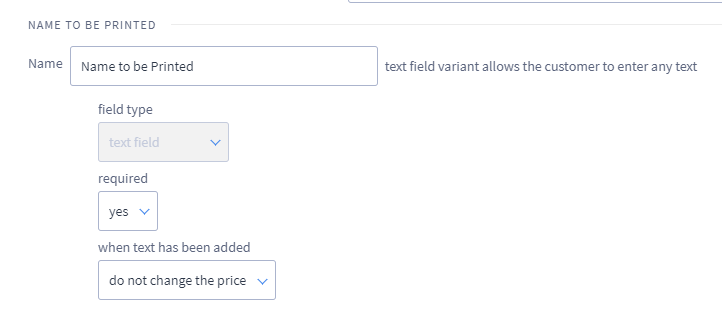
Text Field - This field is used when you wish to accept any input in terms of text content from the customer purchasing the product.
For example, if a product is a Custom mobile case and you would like to accept a customer name which to be printed on the mobile case, then, you may use a text field to accept the input.
Admin settings for Text Field
Below screen would give you an idea of the settings in the variants when selected field type is ‘text field’:
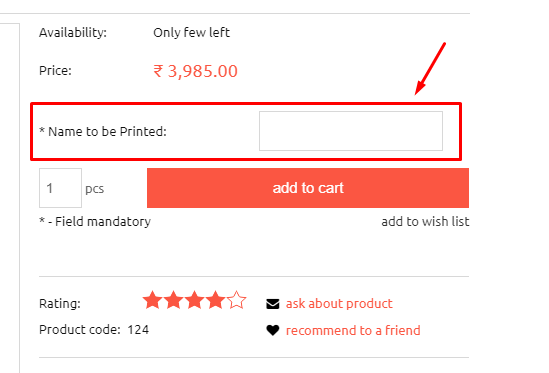
When Text field is used as a variant and assigned to the product, this is how it would look like on the website:
When text has been Added/Values fields : By a certain amount/percentage the price can be increased/decreased when the customer inputs the data.
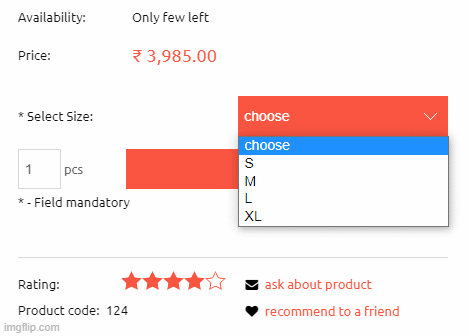
Radio/select field - This field type allows you to add multiple options to the products allowing customers to choose the required ones.
For example: In a garment business, we would need to allow customers to select the required size or in grocery we would need an option to allow customers to choose weight.
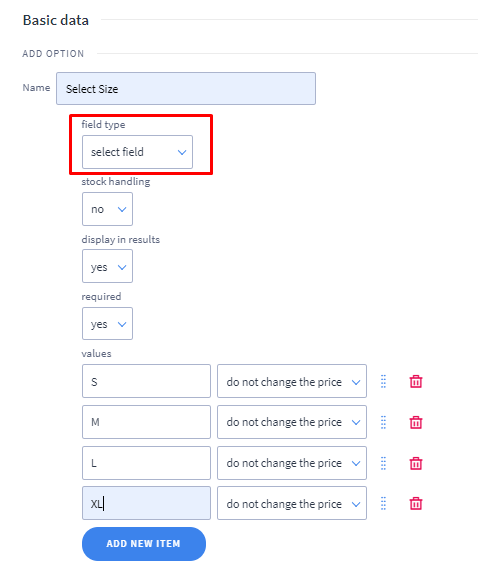
Below screen would give you an idea of the settings in the variants when selected field type is ‘Select Field’:
When Select field is used as a variant and assigned to the product, this is how it would look like on the product details page:
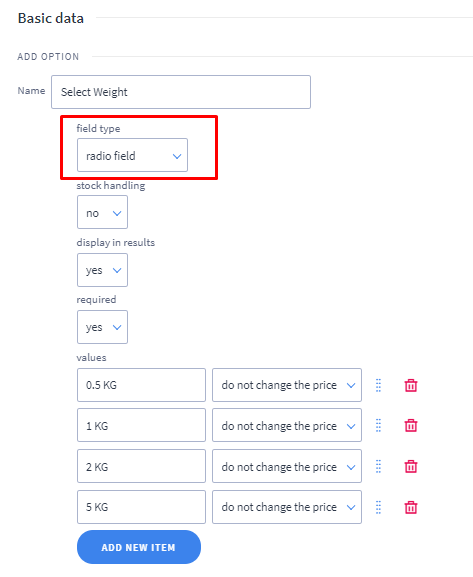
Below screen would give you an idea of the settings in the variants when selected field type is ‘Radio Field’:
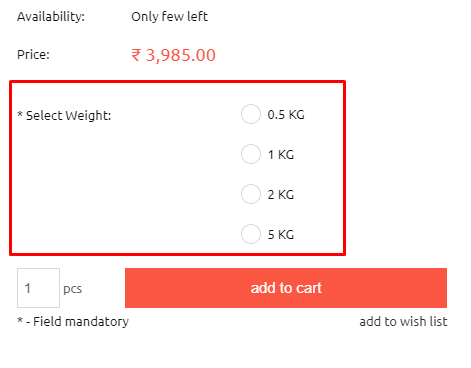
When Radio field is used as a variant and assigned to the product, this is how it would look like on the product details page:
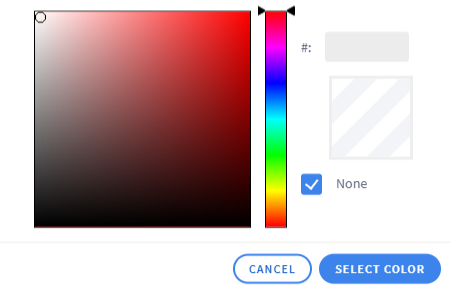
Color palette: This field type allows us to add color pallet options to the products. It can be used to add the available color options to the product mainly garment products and customers can select the variant by clicking on the required pallet.
Below screen would give you an idea of the settings in the variants when selected field type is ‘Color Pallet’:
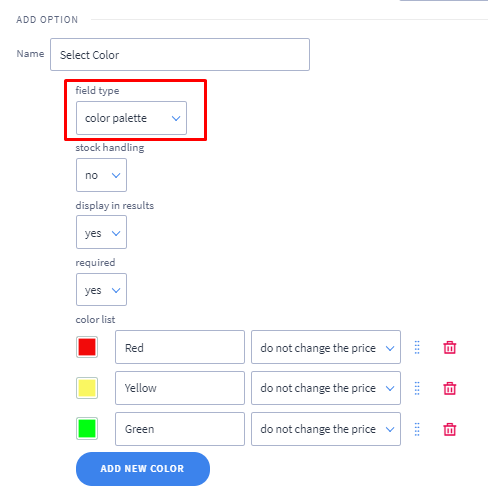
The color palette selection field allows you to choose a color from the "color picker"
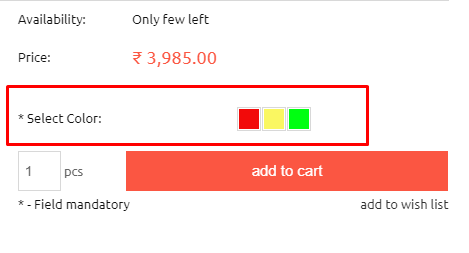
When Color pallet is used as a variant and assigned to the product, this is how it would look like on the product details page:
When we use the select/radio/color pallet field, we get 2 additional options to configure. They are:
Stock Handling: This option can be set to YES OR NO. Setting this option to Yes will allow you to determine the stock level of each variant while generating variants in a product. In other words, we are allowed to assign different stocks to each generated variant value.
If you want to apply common stock for all products then set option Stock handling to NO.
Display in results - allows you to show this variant in the Browse Options module(Filters).
Required - If you wish to keep the variant mandatory for the customers to select then set option 'required' to yes.
Field values - Allows you to add the required values
Price Variation in Values - Allows you to increase/decrease the value of variant.
Note: If you set this condition while generating the variants then it would be applicable for all the products to which this variant is assigned. If you would like to perform this activity only in the particular products, then leave this option as ‘Do not change the price’ and set the actual price variation if required while assigning this variant in the products.
In the group of variants without stock, you can define whether the price should decrease / increase or remain unchanged.
For example: When the product price is Rs. 100, choosing a color (which has +50) will give a price of (100 + 50) that is Rs. 150, if we have another variant, e.g. a checkbox with gift wrap option in the same variant group(which has +30) then the price will be (100 +50 +30), total product price coming to Rs. 180
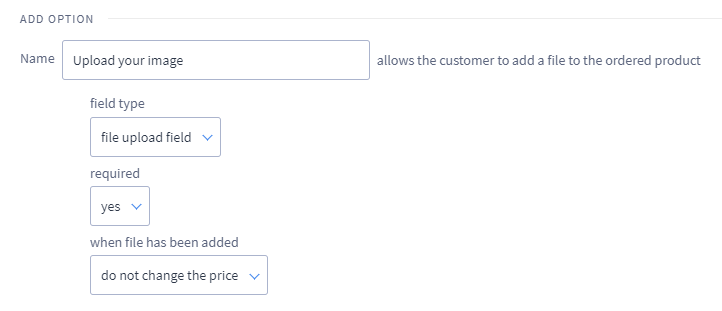
File Upload Field - This field is used when you want to accept any file from the customers.
For example: If a product is a custom mug allowed to print a pic on the mug then use this variant field to accept a file from the customer when they purchase it.
Below screen would give you an idea of the settings in the variants when selected field type is ‘File Upload’:
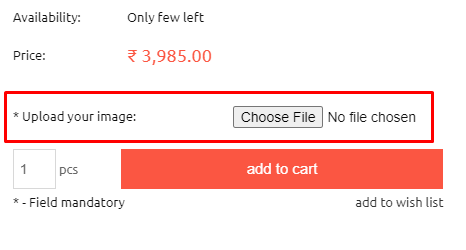
When file upload field is used as a variant and assigned to the product, this is how it would look like on the product details page:
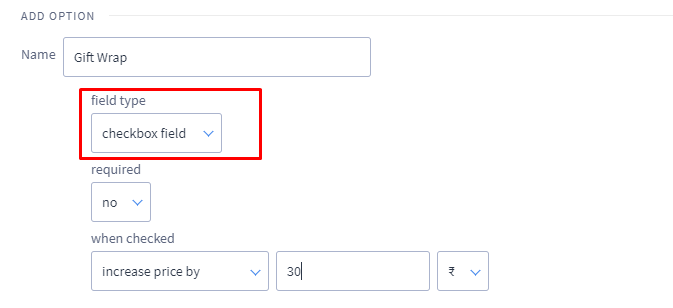
Checkbox Field - This option adds a toggle button of YES or NO. This can be enabled in a case when you would like to accept input only in-terms of YES OR NO.
For example: Gift wrap option where we need only YES or NO input from the customer.
Below screen would give you an idea of the settings in the variants when the selected field type is ‘Checkbox’ field, we have set the settings below such that, when the customer would check this option to yes, Rs. 30 extra would be added to the product price.
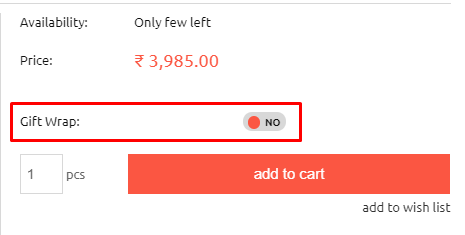
When Checkbox field is used as a variant and assigned to the product, this is how it would look like on the product details page:
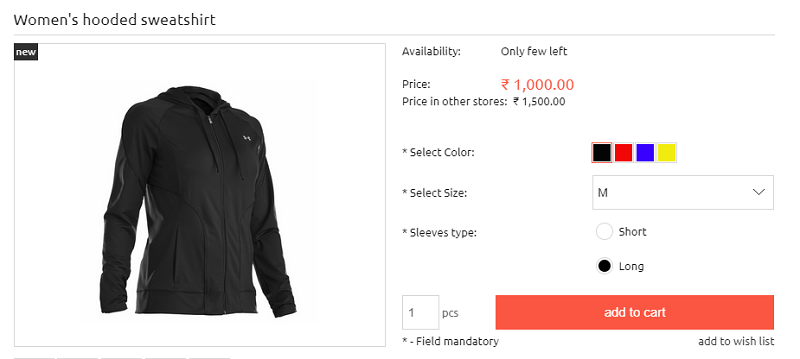
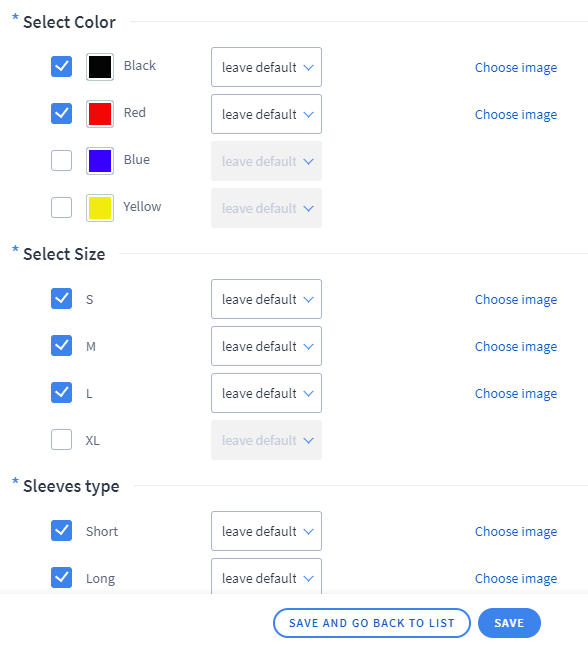
We can also generate multiple variants in one group and assign to the products. Below is the example showing how the variants would display in the product:
B. Assigning the variants to the products:
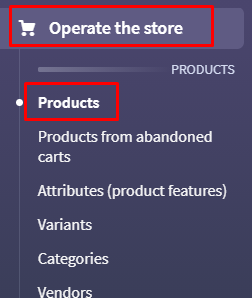
1. Go to Operate the store > Products
2. Edit the required product to which you would like to assign the generated variant
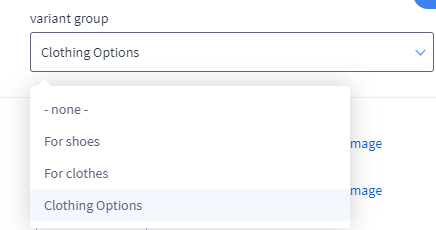
3. From the second left menu, click on ‘Variants’ and select the variant group.
4. Assign the variants which are to be made available in this product for selection (you can also assign the product photo to a variant by clicking option ‘Choose Image’ which would be displayed in the product card upon selecting the variant by the customer).
5. Click on the save button.
